Plotly:如何为 x 轴上的时间序列设置主要刻度线/网格线的值?刻度、网格、序列、何为
背景:
这个问题与
我认为这里显示的自然是 每个月的第一天(当然取决于时间段).或者甚至可能只是一个缩写的月份名称,例如每个刻度上的 'Jan'.由于所有月份的长度不同,我意识到技术甚至视觉上的挑战.但是有人知道怎么做吗?
可重现的片段:
绘图导入将袖扣导入为 cf从 plotly.offline 导入 download_plotlyjs, init_notebook_mode, plot, iplot将熊猫导入为 pd将 numpy 导入为 np从 IPython.display 导入 HTML从 IPython.core.display 导入显示,HTML导入副本# 设置init_notebook_mode(连接=真)np.random.seed(123)cf.set_config_file(主题='珍珠')# 使用袖扣的随机数据df = cf.datagen.lines()#df = df['UUN.XY']fig = df.iplot(asFigure=True, kind='scatter',xTitle='日期',yTitle='回报',title='回报')iplot(无花果)(更新了 plotly 版本的答案)
使用较新版本的 plotly,您可以指定 dtick = 'M1' 以在每个月初设置网格线.也可以通过tickformat格式化月份的显示:
片段 1
fig.update_xaxes(dtick="M2",tickformat=%b
%Y")
情节 1
如果您想每隔一个月设置一次网格线,只需将 M1" 更改为 M2"
情节 2
完整代码:
# 导入将熊猫导入为 pd将 plotly.express 导入为 px# 数据df = px.data.stocks()df = df.tail(40)颜色 = px.colors.qualitative.T10# 情节fig = px.line(df,x = '日期',y = [c for c in df.columns if c != 'date'],模板 = 'plotly_dark',color_discrete_sequence = 颜色,标题='股票',)fig.update_xaxes(dtick=M2",tickformat=%b
%Y")图.show()
旧解决方案:
如何设置网格线将完全取决于您想要显示的内容,以及在您尝试编辑设置之前如何构建图窗.但是要获得问题中指定的结果,可以这样操作.
第一步:
为 fig['data'] 中的每个系列编辑 fig['data'][series]['x'].
第二步:
设置tickmode和ticktext:
go.Layout(xaxis = go.layout.XAxis(tickvals = [some_values]ticktext = [其他值]))结果:
Jupyter Notebook 的完整代码:
# 导入导入情节将袖扣导入为 cf从 plotly.offline 导入 download_plotlyjs, init_notebook_mode, plot, iplot将熊猫导入为 pd将 numpy 导入为 np从 IPython.display 导入 HTML从 IPython.core.display 导入显示,HTML导入副本导入 plotly.graph_objs# 设置init_notebook_mode(连接=真)np.random.seed(123)cf.set_config_file(主题='珍珠')#%qtconsole --style vim# 使用袖扣的随机数据df = cf.datagen.lines()# 创建图形设置fig = df.iplot(asFigure=True, kind='scatter',xTitle='日期',yTitle='回报',title='回报')# 创建 df1 来处理 while# 在 df 中保持源完整df1 = df.copy(deep = True)df1['idx'] = range(0, len(df))# 时间变量操作和格式化df1['yr'] = df1.index.yeardf1['mth'] = df1.index.month_name()# 替换月份名称的函数# 缩写的月份名称和年份# 如果月份是一月def mthFormat(月):dDict = {'一月':'一月','二月':'二月','三月':'三月','四月':'四月','五月':'五月','六月':'六月','七月':'七月','八月':'八月','九月':'九月','十月':'八月','十一月':'十一月', '十二月':'十二月'}mth = dDict[月]返回(mth)# 用缩写的月份名称替换月份名称df1['mth'] = [mthFormat(m) for m in df1['mth']]# 删除年和月的相邻重复项df1['yr'][df1['yr'].shift() == df1['yr']] = ''df1['mth'][df1['mth'].shift() == df1['mth']] = ''# 选择并格式化要显示的值df1['idx'][df1['mth']!='']df1['display'] = df1['idx'][df1['mth']!='']display = df1['display'].dropna()displayVal = display.values.astype('int')df_display = df1.iloc[displayVal]df_display['display'] = df_display['display'].astype('int')df_display['yrmth'] = df_display['mth'] + '<br>'+ df_display['yr'].astype(str)# 为每个跟踪设置属性对于范围内的 ser (0,len(fig['data'])):fig['data'][ser]['x'] = df1['idx'].values.tolist()fig['data'][ser]['text'] = df1['mth'].values.tolist()fig['data'][ser]['hoverinfo']='all'# 整个图形的布局f2Data = fig['数据']f2Layout = go.Layout(xaxis = go.layout.XAxis(滴答模式 = '数组',tickvals = df_display['display'].values.tolist(),ticktext = df_display['yrmth'].values.tolist(),zeroline = False)#,)# 绘制具有指定主要刻度和网格线的图形fig2 = go.Figure(data=f2Data, layout=f2Layout)iplot(图2)一些重要细节:
1.iplot() 的灵活性和限制:
这种使用 iplot() 并编辑所有这些设置的方法有点笨拙,但它在数据集中的列/变量数量方面非常灵活,并且可以说比构建每个跟踪更可取手动像 trace1 = go.Scatter() 为 df 中的每一列.
2.为什么必须编辑每个系列/轨迹?
如果你尝试跳过中间部分
for 范围内的 ser(0,len(fig['data'])):fig['data'][ser]['x'] = df1['idx'].values.tolist()fig['data'][ser]['text'] = df1['mth'].values.tolist()fig['data'][ser]['hoverinfo']='all'并尝试在整个绘图上直接设置tickvals和ticktext,不会有效果:
我觉得这有点奇怪,但我认为这是由 iplot() 发起的一些底层设置引起的.
3.还缺少一件事:
为了让设置正常工作,ticvals 和 ticktext 的结构是 [0, 31, 59, 90] 和 ['jan<br>2015', 'feb<br>', 'mar<br>', 'apr<br>'].这会导致 xaxis 线 hovertext 显示 ticvals 和 ticktext 为空的数据位置:
非常感谢任何有关如何改进整个事情的建议.比我自己更好的解决方案将立即获得已接受答案状态!
Background:
This question is related, but not identical, to Plotly: How to retrieve values for major ticks and gridlines?. A similar question has also been asked but not answered for matplotlib here: How do I show major ticks as the first day of each months and minor ticks as each day?
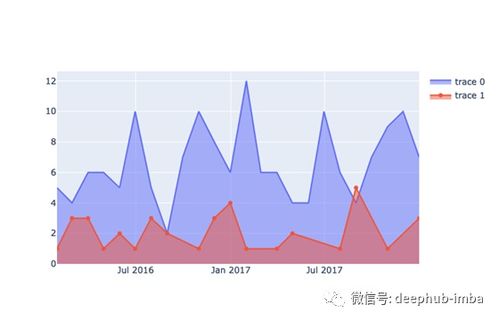
Plotly is fantastic, and maybe the only thing that bothers me is the autoselection of ticks / gridlines and the labels chosen for the x-axis like in this plot:
Plot 1:
I think the natural thing to display here is the first of each month (depending ong the period of course). Or maybe even just an abreviateed month name like 'Jan' on each tick. I realize both the technical and even visual challenges due to the fact that all months are not of equal length. But does anyone know how to do this?
Reproducible snippet:
import plotly
import cufflinks as cf
from plotly.offline import download_plotlyjs, init_notebook_mode, plot, iplot
import pandas as pd
import numpy as np
from IPython.display import HTML
from IPython.core.display import display, HTML
import copy

# setup
init_notebook_mode(connected=True)
np.random.seed(123)
cf.set_config_file(theme='pearl')

# Random data using cufflinks
df = cf.datagen.lines()
#df = df['UUN.XY']

fig = df.iplot(asFigure=True, kind='scatter',
               xTitle='Dates',yTitle='Returns',title='Returns')

iplot(fig)
解决方案
(updated answer for newer versions of plotly)
With newer versions of plotly, you can specy dtick = 'M1' to set gridlines at the beginning of each month. You can also format the display of the month through tickformat:
Snippet 1
fig.update_xaxes(dtick="M2",
                 tickformat="%b
%Y"
)
Plot 1
And if you'd like to set the gridlines at every second month, just change "M1" to "M2"
Plot 2
Complete code:
# imports
import pandas as pd
import plotly.express as px

# data
df = px.data.stocks()
df = df.tail(40)
colors = px.colors.qualitative.T10

# plotly
fig = px.line(df,x = 'date',
                 y = [c for c in df.columns if c != 'date'],
                 template = 'plotly_dark',
                 color_discrete_sequence = colors,
                 title = 'Stocks',
             )

fig.update_xaxes(dtick="M2",
                 tickformat="%b
%Y"
)

fig.show()
Old Solution:
How to set the gridlines will depend entirely on what you'd like to display, and how the figure is built before you try to edit the settings. But to obtain the result specified in the question, you can do it like this.
Step1:
Edit fig['data'][series]['x'] for each series in fig['data'].
Step2:
set tickmode and ticktext in:
go.Layout(xaxis = go.layout.XAxis(tickvals = [some_values]
                                  ticktext = [other_values])
          )
Result:
Complete code for a Jupyter Notebook:
# imports
import plotly
import cufflinks as cf
from plotly.offline import download_plotlyjs, init_notebook_mode, plot, iplot
import pandas as pd
import numpy as np
from IPython.display import HTML
from IPython.core.display import display, HTML
import copy
import plotly.graph_objs as go

# setup
init_notebook_mode(connected=True)
np.random.seed(123)
cf.set_config_file(theme='pearl')
#%qtconsole --style vim

# Random data using cufflinks
df = cf.datagen.lines()

# create figure setup
fig = df.iplot(asFigure=True, kind='scatter',
               xTitle='Dates',yTitle='Returns',title='Returns')

# create df1 to mess around with while
# keeping the source intact in df
df1 = df.copy(deep = True)
df1['idx'] = range(0, len(df))

# time variable operations and formatting
df1['yr'] = df1.index.year
df1['mth'] = df1.index.month_name()

# function to replace month name with
# abbreviated month name AND year
# if the month is january
def mthFormat(month):
    dDict = {'January':'jan','February':'feb', 'March':'mar',
             'April':'apr', 'May':'may','June':'jun', 'July':'jul',
             'August':'aug','September':'sep', 'October':'oct',
             'November':'nov', 'December':'dec'}
    mth = dDict[month]
    return(mth)

# replace month name with abbreviated month name
df1['mth'] = [mthFormat(m) for m in df1['mth']]


# remove adjacent duplicates for year and month
df1['yr'][df1['yr'].shift() == df1['yr']] = ''
df1['mth'][df1['mth'].shift() == df1['mth']] = ''

# select and format values to be displayed
df1['idx'][df1['mth']!='']
df1['display'] = df1['idx'][df1['mth']!='']
display = df1['display'].dropna()
displayVal = display.values.astype('int')
df_display = df1.iloc[displayVal]
df_display['display'] = df_display['display'].astype('int')
df_display['yrmth'] = df_display['mth'] + '<br>' + df_display['yr'].astype(str)

# set properties for each trace
for ser in range(0,len(fig['data'])):

    fig['data'][ser]['x'] = df1['idx'].values.tolist()
    fig['data'][ser]['text'] = df1['mth'].values.tolist()
    fig['data'][ser]['hoverinfo']='all'

# layout for entire figure
f2Data = fig['data']
f2Layout = go.Layout(
    xaxis = go.layout.XAxis(
        tickmode = 'array',
        tickvals = df_display['display'].values.tolist(),
        ticktext = df_display['yrmth'].values.tolist(),
        zeroline = False)#,
)

# plot figure with specified major ticks and gridlines
fig2 = go.Figure(data=f2Data, layout=f2Layout)
iplot(fig2)
Some important details:
1. Flexibility and limitations with iplot():
This approach with iplot() and editing all those settings is a bit clunky, but it's very flexible with regards to the number of columns / variables in the dataset, and arguably preferable to building each trace manually like trace1 = go.Scatter() for each and every column in the df.
2. Why do you have to edit each series / trace?
If you try to skip the middle part with
for ser in range(0,len(fig['data'])):

    fig['data'][ser]['x'] = df1['idx'].values.tolist()
    fig['data'][ser]['text'] = df1['mth'].values.tolist()
    fig['data'][ser]['hoverinfo']='all'
and try to set tickvals and ticktext directly on the entire plot, it will have no effect:
I think that's a bit weird, but I think it's caused by some underlying settings initiated by iplot().
3. One thing is still missing:
In order fot thie setup to work, the structure of ticvals and ticktext is [0, 31, 59, 90] and ['jan<br>2015', 'feb<br>', 'mar<br>', 'apr<br>'], respectively. This causes the xaxis line hovertext show the position of the data where ticvals and ticktext are empty:
Any suggestions on how to improve the whole thing is highly appreciated. Better solutions than my own will instantly receive Accepted Answer status!