如何随着NavigationDrawer滑动动作条动作、NavigationDrawer
我想要做的是幻灯片上的动作条随着 NavigationDrawer 抽屉打开时。我目前没有使用任何第三方库,如果可能的话我希望保持这种方式。我需要的是类似方法的实现: getActionBarView.slide(DP);
这是在code我目前使用创建 NavigationDrawer :
  mDrawerToggle =新ActionBarDrawerToggle(这一点,drawerLayout,R.drawable.ic_drawer,R.string.drawer_open,R.string.drawer_close){

    公共无效onDrawerClosed(查看视图){
        invalidateOptionsMenu();

        //调用prepareOptionsMenu()隐藏操作栏图标
    }

    @覆盖
    公共无效onDrawerSlide(查看drawerView,浮slideOffset){
        如果(getDeviceType(getApplicationContext())== DEVICE_TYPE_PHONE){
            drawerLayout.setScrimColor(Color.parseColor(#00FFFFFF));
            浮动moveFactor =(listView.getWidth()* slideOffset);
            如果(Build.VERSION.SDK_INT> = Build.VERSION_ codeS.HONEYCOMB){
                all_menu_container_parent.setTranslationX(moveFactor);
            } 其他 {
                TranslateAnimation动画=新TranslateAnimation(lastTranslate,moveFactor,0.0,0.0);
                anim.setDuration(0);
                anim.setFillAfter(真正的);
                all_menu_container_parent.startAnimation(动画);

                lastTranslate = moveFactor;
            }
        }
    }

    公共无效onDrawerOpened(查看drawerView){
        //调用prepareOptionsMenu()隐藏操作栏图标
    }
};
drawerLayout.setDrawerListener(mDrawerToggle);
不过,这并不做我想做的,它会产生这样的:
我想实现是这样的:
解决方案
请注意:这个答案最初是在Android 4.4系统(奇巧)仍然是pretty的新。由于Android 5.0,特别是
由于引入了工具栏的这个答案不能
考虑了最新的了!但是,从技术角度和
你们谁想要了解关于Android的内部运作
这个答案可能仍然持有大量的价值!
在 NavigationDrawer 是专门设计,位于下方的动作条,也没有办法落实 NavigationDrawer ,使动作条动它 - 除非也许寻找查看这构成了动作条键,沿着其动画的 NavigationDrawer ,但我绝不会推荐这样的事情,因为它将是困难和容易出错。在我看来,你只有两个选择:
既然你说你不想使用实现自定义的滑动菜单是唯一的选择图书馆,幸运的是这是真的没有那么难,一旦你知道怎么做了。
1)基本说明
您可以将活动的全部内容 - 我的意思是一切,包括动作条 - 通过将保证金或在查看这构成了活动的填充。这查看是查看的ID的父 android.R.id.content :
查看内容=(查看)activity.findViewById(android.R.id.content).getParent();
在蜂巢(Android版3.0 - API级别11)或以上 - 换句话说,在动作条引入 - 你需要用利润来修改活动位置和previous版本,你需要使用的填充。为了简化这一点,我建议创建它执行正确的行动,每个API级别的辅助方法。让我们先看看如何设置活动的位置:
 公共无效setActivityPosition(INT X,int y)对{
    //有了这个if语句中,我们可以检查设备的API级别高于蜂窝或以下
    如果(Build.VERSION.SDK_INT> = Build.VERSION_ codeS.HONEYCOMB){
        //在蜂窝或abvoe我们设置的边距
        FrameLayout.LayoutParams contentParams =(FrameLayout.LayoutParams)this.content.getLayoutParams();
        contentParams.setMargins(X,Y,-x,-y);
        this.content.setLayoutParams(contentParams);
    } 其他 {
        //而下面蜂窝设备,我们设置了填充
        this.content.setPadding(X,Y,-x,-y);
    }
}
注意,在这两种情况下可以是一个负余量或在相对侧上的负填充。这是从根本上提高了活动的大小超出正常范围。这prevents的活动的实际大小,当我们在某处其滑动来改变。
另外,我们需要两个方法来获取活动的当前位置。一为x位置,一个用于y坐标:
 公众诠释getActivityPositionX(){
    如果(Build.VERSION.SDK_INT> = Build.VERSION_ codeS.HONEYCOMB){
        //在蜂窝或以上,我们回到左边距
        FrameLayout.LayoutParams contentParams =(FrameLayout.LayoutParams)this.content.getLayoutParams();
        返回contentParams.leftMargin;
    } 其他 {
        //在下面蜂窝设备,我们返回的左填充
        返回this.content.getPaddingLeft();
    }
}

公众诠释getActivityPositionY(){
    如果(Build.VERSION.SDK_INT> = Build.VERSION_ codeS.HONEYCOMB){
        //在蜂窝或以上,我们返回顶部边距
        FrameLayout.LayoutParams contentParams =(FrameLayout.LayoutParams)this.content.getLayoutParams();
        返回contentParams.topMargin;
    } 其他 {
        //在下面蜂窝设备,我们返回顶部填充
        返回this.content.getPaddingTop();
    }
}
这也很简单,添加动画。这里唯一重要的事情是位数学来它从previous位置动画到新的位置
  //我们得到了活动的当前位置
最终诠释currentX = getActivityPositionX();
最终诠释currentY = getActivityPositionY();

//新的位置设置
setActivityPosition(X,Y);

//我们动画的活动从其previous位置滑动到新的位置
TranslateAnimation动画=新TranslateAnimation(currentX  - 的x,0,currentY  -  Y,0);
animation.setDuration(500);
this.content.startAnimation(动画);
您可以显示一个查看在这是由滑离了活动显示位置通过将其添加到在查看父:
 最终诠释currentX = getActivityPositionX();

的FrameLayout MenuContainer中=新的FrameLayout(上下文);

//菜单的宽度等于`Activity`的x位置
FrameLayout.LayoutParams PARAMS =新FrameLayout.LayoutParams(currentX,ViewGroup.LayoutParams.MATCH_PARENT);
menuContainer.setLayoutParams(PARAMS);

ViewGroup中父=(ViewGroup中)content.getParent();
parent.addView(MenuContainer中);
这是pretty的太多所有你需要创建一个基本的滑动菜单上的大部分工作,如果不是上面Eclair的所有设备(Android 2.1的 - API 7级)。
2)的动画活动
创建一个滑动菜单的第一部分是使活动招出的方式。因此,我们应该首先尝试移动活动周围像这样:
要创建这一点,我们就必须把code以上在一起:
 进口android.os.Build;
进口android.support.v4.app.FragmentActivity;
进口android.view.View;
进口android.view.animation.TranslateAnimation;
进口android.widget.FrameLayout;

公共类ActivitySlider {

    私人最终FragmentActivity活动;
    私人最终显示的内容;

    公共ActivitySlider(FragmentActivity活动){
        this.activity =活动;

        //这里我们从活动的内容视图。
        this.content =(查看)activity.findViewById(android.R.id.content).getParent();
    }

    公共无效slideTo(INT X,int y)对{

        //我们得到了活动的当前位置
        最终诠释currentX = getActivityPositionX();
        最终诠释currentY = getActivityPositionY();

        //新的位置设置
        setActivityPosition(X,Y);

        //我们动画的活动从其previous位置滑动到新的位置
        TranslateAnimation动画=新TranslateAnimation(currentX  - 的x,0,currentY  -  Y,0);
        animation.setDuration(500);
        this.content.startAnimation(动画);
    }

    公共无效setActivityPosition(INT X,int y)对{
        //有了这个if语句中,我们可以检查设备的API级别高于蜂窝或以下
        如果(Build.VERSION.SDK_INT> = Build.VERSION_ codeS.HONEYCOMB){
            //在蜂窝或以上,我们设置了保证金
            FrameLayout.LayoutParams contentParams =(FrameLayout.LayoutParams)this.content.getLayoutParams();
            contentParams.setMargins(X,Y,-x,-y);
            this.content.setLayoutParams(contentParams);
        } 其他 {
            //而下面蜂窝设备,我们设置了填充
            this.content.setPadding(X,Y,-x,-y);
        }
    }

    公众诠释getActivityPositionX(){
        如果(Build.VERSION.SDK_INT> = Build.VERSION_ codeS.HONEYCOMB){
            //在蜂窝或以上,我们回到左边距
            FrameLayout.LayoutParams contentParams =(FrameLayout.LayoutParams)this.content.getLayoutParams();
            返回contentParams.leftMargin;
        } 其他 {
            //在下面蜂窝设备,我们返回的左填充
            返回this.content.getPaddingLeft();
        }
    }

    公众诠释getActivityPositionY(){
        如果(Build.VERSION.SDK_INT> = Build.VERSION_ codeS.HONEYCOMB){
            //在蜂窝或以上,我们返回顶部边距
            FrameLayout.LayoutParams contentParams =(FrameLayout.LayoutParams)this.content.getLayoutParams();
            返回contentParams.topMargin;
        } 其他 {
            //在下面蜂窝设备,我们返回顶部填充
            返回this.content.getPaddingTop();
        }
    }
}
您可以使用 ActivitySlider 类是这样的:
  ActivitySlider滑块=新ActivitySlider(活动);

//这将移动活动400像素的权利和100像素下降
slider.slideTo(400,100);
3)添加的滑动菜单
现在,我们想透露一个菜单时,活动移出了这样的方式:
正如你可以看到它也推动了动作条到了一边。
在 ActivitySlider 类不需要进行修改,那么多创造一个滑动菜单,基本上我们只需添加两个方法, showMenu()和 hideMenu()。我会坚持的最佳实践,并使用片段的滑动菜单。我们需要需要做的第一件事是查看 - 例如的FrameLayout - 作为一个容器为片段。我们需要添加此查看到查看的活动的父:
  //我们得到了活动的观
查看内容=(查看)activity.findViewById(android.R.id.content).getParent();

//及其母公司
ViewGroup中父=(ViewGroup中)content.getParent();

//容器的菜单片段是一个的FrameLayout
//我们设置一个id,所以我们可以在以后执行FragmentTransactions
的FrameLayout MenuContainer中=新的FrameLayout(this.activity);
menuContainer.setId(R.id.flMenuContainer);

//可见性设置为GONE因为菜单最初是隐藏
menuContainer.setVisibility(View.GONE);

//容器的菜单片段被添加到父
parent.addView(MenuContainer中);
由于我们设定的容器查看以可见能见度只有当滑动菜单实际上是开放的,我们可以用下面的方法来检查菜单打开或关闭
 公共布尔isMenuVisible(){
    返回this.menuContainer.getVisibility()== View.VISIBLE;
}
要设置菜单片段我们添加一个setter方法执行 FragmentTransaction 并添加菜单片段到的FrameLayout :
 公共无效setMenuFragment(片段片段){
    FragmentManager经理= this.activity.getSupportFragmentManager();
    FragmentTransaction交易= manager.beginTransaction();
    transaction.replace(R.id.flMenuContainer,片段);
    器transaction.commit();
}
我也倾向于添加的实例化片段第二二传手从类为方便:
 公开<吨延伸片断>无效setMenuFragment(类< T>的cls){
    片段片段= Fragment.instantiate(this.activity,cls.getName());
    setMenuFragment(片段);
}
还有额外的一件重要的事情,当涉及到菜单片段来考虑。我们经营更远了在查看层次比正常。因此,我们必须采取像在状态栏在内的高度。如果我们不考虑菜单此之上片段我们会被隐藏状态栏的后面。你可以得到这样的状态栏的高度:
  rect矩形=新的矩形();
窗口窗口= this.activity.getWindow();
。window.getDecorView()getWindowVisibleDisplayFrame(矩形);
最终诠释statusBarHeight = rectangle.top;
我们必须把上边距菜单的容器查看在片段是这样的:
  //这是对的LayoutParams菜单片段
FrameLayout.LayoutParams PARAMS =新FrameLayout.LayoutParams(宽,ViewGroup.LayoutParams.MATCH_PARENT);

//我们把一个顶边距上的菜单片段容器等于状态栏的高度
params.setMargins(0,statusBarHeight,0,0);
menuContainer.setLayoutParams(fragmentParams);
最后,我们可以把这个放在一起:
进口android.graphics.Rect;
进口android.os.Build;
进口android.support.v4.app.Fragment;
进口android.support.v4.app.FragmentActivity;
进口android.support.v4.app.FragmentManager;
进口android.support.v4.app.FragmentTransaction;
进口android.view.View;
进口android.view.ViewGroup;
进口android.view.Window;
进口android.view.animation.Animation;
进口android.view.animation.TranslateAnimation;
进口android.widget.FrameLayout;
进口at.test.app.R;
进口at.test.app.helper.LayoutHelper;
公共类ActivitySlider {
私人最终FragmentActivity活动;
私人最终显示的内容;
私人最终的FrameLayout MenuContainer中;
公共ActivitySlider(FragmentActivity活动){
this.activity =活动;
//我们得到了活动的观
this.content =(查看)activity.findViewById(android.R.id.content).getParent();
//及其母公司
ViewGroup中父=(ViewGroup中)this.content.getParent();
//容器的菜单片段被添加到父。我们设置一个id,所以我们可以在以后执行FragmentTransactions
this.menuContainer =新的FrameLayout(this.activity);
this.menuContainer.setId(R.id.flMenuContainer);
//我们设置可见里去了,因为菜单最初是隐藏
this.menuContainer.setVisibility(View.GONE);
parent.addView(this.menuContainer);
}
公众<吨延伸片断>无效setMenuFragment(类< T>的cls){
片段片段= Fragment.instantiate(this.activity,cls.getName());
setMenuFragment(片段);
}
公共无效setMenuFragment(片段片段){
FragmentManager经理= this.activity.getSupportFragmentManager();
FragmentTransaction交易= manager.beginTransaction();
transaction.replace(R.id.flMenuContainer,片段);
器transaction.commit();
}
公共布尔isMenuVisible(){
返回this.menuContainer.getVisibility()== View.VISIBLE;
}
//我们通过菜单的宽度浸showMenu()
公共无效showMenu(INT dpWidth){
//我们转换的宽度从浸入像素
最终诠释menuWidth = LayoutHelper.dpToPixel(this.activity,dpWidth);
//我们将活动的出路
slideTo(menuWidth,0);
//我们必须采取顶部的状态栏的高度考虑!
rect矩形=新的矩形();
窗口窗口= this.activity.getWindow();
。window.getDecorView()getWindowVisibleDisplayFrame(矩形);
最终诠释statusBarHeight = rectangle.top;
//这些是的LayoutParams用于菜单片段
FrameLayout.LayoutParams fragmentParams =新FrameLayout.LayoutParams(menuWidth,ViewGroup.LayoutParams.MATCH_PARENT);
//我们把一个顶边距上的菜单片段容器等于状态栏的高度
fragmentParams.setMargins(0,statusBarHeight,0,0);
this.menuContainer.setLayoutParams(fragmentParams);
//执行动画仅当菜单是不可见
如果(!isMenuVisible()){
//菜单容器视图的可见性设置为可见
this.menuContainer.setVisibility(View.VISIBLE);
//菜单从右侧滑入
TranslateAnimation动画=新TranslateAnimation(-menuWidth,0,0,0);
animation.setDuration(500);
this.menuContainer.startAnimation(动画);
}
}
公共无效hideMenu(){
//我们只能隐藏菜单,如果它是可见
如果(isMenuVisible()){
//我们活动背面滑动到原来的位置
slideTo(0,0);
//我们需要在菜单的宽度适当地制作动画
最终诠释menuWidth = this.menuContainer.getWidth();
//现在我们需要一个额外的动画菜单片段容器
TranslateAnimation menuAnimation =新TranslateAnimation(0,-menuWidth,0,0);
menuAnimation.setDuration(500);
menuAnimation.setAnimationListener(新Animation.AnimationListener(){
@覆盖
公共无效onAnimationStart(动画动画){
}
@覆盖
公共无效onAnimationEnd(动画动画){
//只要隐藏动画完成后,我们设定片段容器的可见性回GONE
menuContainer.setVisibility(View.GONE);
}
@覆盖
公共无效onAnimationRepeat(动画动画){
}
});
this.menuContainer.startAnimation(menuAnimation);
}
}
公共无效slideTo(INT X,int y)对{
//我们得到了活动的当前位置
最终诠释currentX = getActivityPositionX();
最终诠释currentY = getActivityPositionY();
//新的位置设置
setActivityPosition(X,Y);
//我们动画的活动从其previous位置滑动到新的位置
TranslateAnimation动画=新TranslateAnimation(currentX - 的x,0,currentY - Y,0);
animation.setDuration(500);
this.content.startAnimation(动画);
}
公共无效setActivityPosition(INT X,int y)对{
//有了这个if语句中,我们可以检查设备的API级别高于蜂窝或以下
如果(Build.VERSION.SDK_INT> = Build.VERSION_ codeS.HONEYCOMB){
//在蜂窝或以上,我们设置了保证金
FrameLayout.LayoutParams contentParams =(FrameLayout.LayoutParams)this.content.getLayoutParams();
contentParams.setMargins(X,Y,-x,-y);
this.content.setLayoutParams(contentParams);
} 其他 {
//而下面蜂窝设备,我们设置了填充
this.content.setPadding(X,Y,-x,-y);
}
}
公众诠释getActivityPositionX(){
如果(Build.VERSION.SDK_INT> = Build.VERSION_ codeS.HONEYCOMB){
//在蜂窝或以上,我们回到左边距
FrameLayout.LayoutParams contentParams =(FrameLayout.LayoutParams)this.content.getLayoutParams();
返回contentParams.leftMargin;
} 其他 {
//在下面蜂窝设备,我们返回的左填充
返回this.content.getPaddingLeft();
}
}
公众诠释getActivityPositionY(){
如果(Build.VERSION.SDK_INT> = Build.VERSION_ codeS.HONEYCOMB){
//在蜂窝或以上,我们返回顶部边距
FrameLayout.LayoutParams contentParams =(FrameLayout.LayoutParams)this.content.getLayoutParams();
返回contentParams.topMargin;
} 其他 {
//在下面蜂窝设备,我们返回顶部填充
返回this.content.getPaddingTop();
}
}
}
我用 showMenu一个静态辅助方法()来DIP转换为像素。下面是该方法的code:
 公共静态INT dpToPixel(上下文的背景下,INT DP){
    浮规模= getDisplayDensityFactor(上下文);
    返程(INT)(DP *规模+ 0.5F);
}

私有静态浮动getDisplayDensityFactor(上下文的背景下){
    如果(背景!= NULL){
        资源RES = context.getResources();
        如果(RES!= NULL){
            DisplayMetrics度量= res.getDisplayMetrics();
            如果(指标!= NULL){
                返回metrics.density;
            }
        }
    }
    返回1.0F;
}
您可以使用 ActivitySlider 类像这样的新版本:
  ActivitySlider滑块=新ActivitySlider(活动);
slider.setMenuFragment(MenuFragment.class);

//菜单显示与200浸宽度
slider.showMenu(200);

...

//再次隐藏菜单
slider.hideMenu();
4)总结&安培;测试
做这样的事情是非常容易的,当你知道你可以简单地把保证金或在查看的活动。但困难是在使其上有很多不同的设备的工作。可以实现跨多个API级别发生很大的变化,并且能够对如何表现相当的影响力。话说回来,任何code我张贴在这里应该在最上面,如果埃克莱尔(的Android 2.1 - API 7级)不是所有的设备没有任何问题。
当然,我在这里张贴的解决方案是不完整的,它可以使用一些额外的抛光和清理,可以随意提高code,以满足您的需求!
我对下列设备进行测试的一切:
HTC
一M8(安卓4.4.2 - 奇巧):工作 迷情(安卓4.0.3 - 冰淇淋三明治):工作 欲望(安卓2.3.3 - 姜饼):工作 一(安卓4.4.2 - 奇巧):工作三星
的Galaxy S3迷你(安卓4.1.2 - 果冻豆):工作 银河S4迷你(安卓4.2.2 - 果冻豆):工作 银河S4(安卓4.4.2 - 奇巧):工作 银河S5(安卓4.4.2 - 奇巧):工作 的Galaxy S加(安卓2.3.3 - 姜饼):工作 银河王牌(安卓2.3.6 - 姜饼):工作 GALAXY S2(安卓4.1.2 - 果冻豆):工作 的Galaxy S3(安卓4.3 - 果冻豆):工作 银河注2(安卓4.3 - 果冻豆):工作 Galaxy Nexus的(安卓4.2.1 - 果冻豆):工作摩托罗拉
摩托G(的Android 4.4.2 - 奇巧):工作LG
的Nexus 5(的Android 4.4.2 - 奇巧):工作,中兴通讯
刀片(Android 2.1的 - 埃克莱尔):工作我希望我可以帮你,如果你有任何问题或其他任何不清楚,请随时问!
What I want to do is slide the ActionBar along with the NavigationDrawer when the drawer is opened. I am currently not using any third party libraries and if at all possible I want to keep it that way. All i need is an implementation of method like: getActionBarView.slide(dp);
This is the code I currently use to create the NavigationDrawer:
mDrawerToggle = new ActionBarDrawerToggle(this, drawerLayout, R.drawable.ic_drawer, R.string.drawer_open, R.string.drawer_close) {

    public void onDrawerClosed(View view) {
        invalidateOptionsMenu();

        // calling onPrepareOptionsMenu() to hide action bar icons
    }

    @Override
    public void onDrawerSlide(View drawerView, float slideOffset) {
        if (getDeviceType(getApplicationContext()) == DEVICE_TYPE_PHONE) {
            drawerLayout.setScrimColor(Color.parseColor("#00FFFFFF"));
            float moveFactor = (listView.getWidth() * slideOffset);
            if (Build.VERSION.SDK_INT >= Build.VERSION_CODES.HONEYCOMB) {
                all_menu_container_parent.setTranslationX(moveFactor);
            } else {
                TranslateAnimation anim = new TranslateAnimation(lastTranslate, moveFactor, 0.0f, 0.0f);
                anim.setDuration(0);
                anim.setFillAfter(true);
                all_menu_container_parent.startAnimation(anim);

                lastTranslate = moveFactor;
            }
        }
    }

    public void onDrawerOpened(View drawerView) {
        // calling onPrepareOptionsMenu() to hide action bar icons
    }
};
drawerLayout.setDrawerListener(mDrawerToggle);
But it doesn't do what I want, it produces this:
What I want to achieve is this:
解决方案PLEASE NOTE: This answer was originally written when Android 4.4 (KitKat) was still pretty new. Since Android 5.0 and especially
because of the introduction of the ToolBar this answer cannot be
considered up-to-date anymore! But from a technical perspective and for
those of you who want to learn about the inner workings of Android
this answer might still hold a lot of value!
The NavigationDrawer was specifically designed to be situated below the ActionBar and there is no way to implement the NavigationDrawer to make the ActionBar move with it - unless maybe looking for the View which makes up the ActionBar and animating it alongside the NavigationDrawer, but I would never recommend something like this as it would be difficult and error prone. In my opinion you only have two options:
Since you said that you don't want to use a library implementing a custom sliding menu is your only option, fortunately this is really not that hard once you know how to do it.
1) Basic Explanation
You can move the whole content of the Activity - I mean everything including the ActionBar - by putting a margin or a padding on the View which makes up the Activity. This View is the parent of the View with the id android.R.id.content:
View content = (View) activity.findViewById(android.R.id.content).getParent();
On Honeycomb (Android version 3.0 - API level 11) or above - in other words after the ActionBar was introduced - you need to use margins to change the Activities position and on previous versions you need to use a padding. To simplify this I recommend creating helper methods which perform the correct action for each API level. Let's first look at how to set the position of the Activity:
public void setActivityPosition(int x, int y) {
    // With this if statement we can check if the devices API level is above Honeycomb or below
    if(Build.VERSION.SDK_INT >= Build.VERSION_CODES.HONEYCOMB) {
        // On Honeycomb or abvoe we set a margin
        FrameLayout.LayoutParams contentParams = (FrameLayout.LayoutParams) this.content.getLayoutParams();
        contentParams.setMargins(x, y, -x, -y);
        this.content.setLayoutParams(contentParams);
    } else {
        // And on devices below Honeycomb we set a padding
        this.content.setPadding(x, y, -x, -y);
    }
}
Notice that in both cases there is either a negative margin or a negative padding on the opposite sides. This is to essentially increase the size of the Activity beyond its normal bounds. This prevents the actual size of the Activity to change when we slide it somewhere.
We additionally need two methods to get the current position of the Activity. One for the x position, one for the y position:
public int getActivityPositionX() {
    if(Build.VERSION.SDK_INT >= Build.VERSION_CODES.HONEYCOMB) {
        // On Honeycomb or above we return the left margin
        FrameLayout.LayoutParams contentParams = (FrameLayout.LayoutParams) this.content.getLayoutParams();
        return contentParams.leftMargin;
    } else {
        // On devices below Honeycomb we return the left padding
        return this.content.getPaddingLeft();
    }
}

public int getActivityPositionY() {
    if(Build.VERSION.SDK_INT >= Build.VERSION_CODES.HONEYCOMB) {
        // On Honeycomb or above we return the top margin
        FrameLayout.LayoutParams contentParams = (FrameLayout.LayoutParams) this.content.getLayoutParams();
        return contentParams.topMargin;
    } else {
        // On devices below Honeycomb we return the top padding
        return this.content.getPaddingTop();
    }
}
It is also very simple to add animations. The only important thing here is a bit of math to animate it from its previous position to its new position
// We get the current position of the Activity
final int currentX = getActivityPositionX();
final int currentY = getActivityPositionY();

// The new position is set
setActivityPosition(x, y);

// We animate the Activity to slide from its previous position to its new position
TranslateAnimation animation = new TranslateAnimation(currentX - x, 0, currentY - y, 0);
animation.setDuration(500);
this.content.startAnimation(animation);
You can display a View at the location which is revealed by sliding away the Activity by adding it to the parent of the View:
final int currentX = getActivityPositionX();

FrameLayout menuContainer = new FrameLayout(context);

// The width of the menu is equal to the x position of the `Activity`
FrameLayout.LayoutParams params = new FrameLayout.LayoutParams(currentX, ViewGroup.LayoutParams.MATCH_PARENT);
menuContainer.setLayoutParams(params);

ViewGroup parent = (ViewGroup) content.getParent();
parent.addView(menuContainer);
And that is pretty much all you need to create a basic sliding menu that works on most if not all devices above Eclair (Android 2.1 - API level 7).
2) Animating the Activity
The first part of creating a sliding menu is making the Activity move out of the way. As such we should first try to move the Activity around like this:
To create this we just have to put the code above together:
import android.os.Build;
import android.support.v4.app.FragmentActivity;
import android.view.View;
import android.view.animation.TranslateAnimation;
import android.widget.FrameLayout;

public class ActivitySlider {

    private final FragmentActivity activity;
    private final View content;

    public ActivitySlider(FragmentActivity activity) {
        this.activity = activity;

        // Here we get the content View from the Activity.
        this.content = (View) activity.findViewById(android.R.id.content).getParent();
    }

    public void slideTo(int x, int y) {

        // We get the current position of the Activity
        final int currentX = getActivityPositionX();
        final int currentY = getActivityPositionY();

        // The new position is set
        setActivityPosition(x, y);

        // We animate the Activity to slide from its previous position to its new position
        TranslateAnimation animation = new TranslateAnimation(currentX - x, 0, currentY - y, 0);
        animation.setDuration(500);
        this.content.startAnimation(animation);
    }

    public void setActivityPosition(int x, int y) {
        // With this if statement we can check if the devices API level is above Honeycomb or below
        if (Build.VERSION.SDK_INT >= Build.VERSION_CODES.HONEYCOMB) {
            // On Honeycomb or above we set a margin
            FrameLayout.LayoutParams contentParams = (FrameLayout.LayoutParams) this.content.getLayoutParams();
            contentParams.setMargins(x, y, -x, -y);
            this.content.setLayoutParams(contentParams);
        } else {
            // And on devices below Honeycomb we set a padding
            this.content.setPadding(x, y, -x, -y);
        }
    }

    public int getActivityPositionX() {
        if (Build.VERSION.SDK_INT >= Build.VERSION_CODES.HONEYCOMB) {
            // On Honeycomb or above we return the left margin
            FrameLayout.LayoutParams contentParams = (FrameLayout.LayoutParams) this.content.getLayoutParams();
            return contentParams.leftMargin;
        } else {
            // On devices below Honeycomb we return the left padding
            return this.content.getPaddingLeft();
        }
    }

    public int getActivityPositionY() {
        if (Build.VERSION.SDK_INT >= Build.VERSION_CODES.HONEYCOMB) {
            // On Honeycomb or above we return the top margin
            FrameLayout.LayoutParams contentParams = (FrameLayout.LayoutParams) this.content.getLayoutParams();
            return contentParams.topMargin;
        } else {
            // On devices below Honeycomb we return the top padding
            return this.content.getPaddingTop();
        }
    }
}
You can use the ActivitySlider class like this:
ActivitySlider slider = new ActivitySlider(activity);

// This would move the Activity 400 pixel to the right and 100 pixel down
slider.slideTo(400, 100);
3) Adding the sliding menu
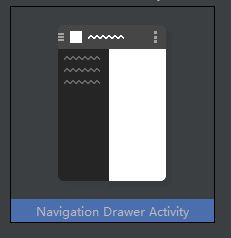
Now we want to reveal a menu when the Activity moves out of the way like this:
As you can see it also pushes the ActionBar to the side.
The ActivitySlider class does not need to be modified that much to create a sliding menu, basically we just add two methods, showMenu() and hideMenu(). I will stick to best practices and use a Fragment as the sliding menu. The first thing we need need is a View - for example a FrameLayout - as a container for our Fragment. We need to add this View to the parent of the View of the Activity:
// We get the View of the Activity
View content = (View) activity.findViewById(android.R.id.content).getParent();

// And its parent
ViewGroup parent = (ViewGroup)  content.getParent();

// The container for the menu Fragment is a FrameLayout
// We set an id so we can perform FragmentTransactions later on
FrameLayout menuContainer = new FrameLayout(this.activity);
menuContainer.setId(R.id.flMenuContainer);

// The visibility is set to GONE because the menu is initially hidden
menuContainer.setVisibility(View.GONE);

// The container for the menu Fragment is added to the parent
parent.addView(menuContainer);
Since we set the visibility of the container View to VISIBLE only when the sliding menu is actually open we can use the following method to check if the menu is open or closed:
public boolean isMenuVisible() {
    return this.menuContainer.getVisibility() == View.VISIBLE;
}
To set the menu Fragment we add a setter method that performs a FragmentTransaction and adds the menu Fragment to the FrameLayout:
public void setMenuFragment(Fragment fragment) {
    FragmentManager manager = this.activity.getSupportFragmentManager();
    FragmentTransaction transaction = manager.beginTransaction();
    transaction.replace(R.id.flMenuContainer, fragment);
    transaction.commit();
}
I also tend to add a second setter which instantiates the Fragment from a Class for convenience:
public <T extends Fragment> void setMenuFragment(Class<T> cls) {
    Fragment fragment = Fragment.instantiate(this.activity, cls.getName());
    setMenuFragment(fragment);
}
There is one additional important thing to consider when it comes to the menu Fragment. We are operating much further up in the View hierarchy than normally. As such we have to take things like the height of the status bar into account. If we didn't account for this the top of the menu Fragment would we be hidden behind the status bar. You can get the height of the status bar like this:
Rect rectangle = new Rect();
Window window = this.activity.getWindow();
window.getDecorView().getWindowVisibleDisplayFrame(rectangle);
final int statusBarHeight = rectangle.top;
We have to put a top margin on the container View of the menu Fragment like this:
// These are the LayoutParams for the menu Fragment
FrameLayout.LayoutParams params = new FrameLayout.LayoutParams(width, ViewGroup.LayoutParams.MATCH_PARENT);

// We put a top margin on the menu Fragment container which is equal to the status bar height
params.setMargins(0, statusBarHeight, 0, 0);
menuContainer.setLayoutParams(fragmentParams);
Finally we can put all this together:
import android.graphics.Rect;
import android.os.Build;
import android.support.v4.app.Fragment;
import android.support.v4.app.FragmentActivity;
import android.support.v4.app.FragmentManager;
import android.support.v4.app.FragmentTransaction;
import android.view.View;
import android.view.ViewGroup;
import android.view.Window;
import android.view.animation.Animation;
import android.view.animation.TranslateAnimation;
import android.widget.FrameLayout;
import at.test.app.R;
import at.test.app.helper.LayoutHelper;

public class ActivitySlider {

    private final FragmentActivity activity;
    private final View content;
    private final FrameLayout menuContainer;

    public ActivitySlider(FragmentActivity activity) {
        this.activity = activity;

        // We get the View of the Activity
        this.content = (View) activity.findViewById(android.R.id.content).getParent();

        // And its parent
        ViewGroup parent = (ViewGroup) this.content.getParent();

        // The container for the menu Fragment is added to the parent. We set an id so we can perform FragmentTransactions later on
        this.menuContainer = new FrameLayout(this.activity);
        this.menuContainer.setId(R.id.flMenuContainer);

        // We set visibility to GONE because the menu is initially hidden
        this.menuContainer.setVisibility(View.GONE);
        parent.addView(this.menuContainer);
    }

    public <T extends Fragment> void setMenuFragment(Class<T> cls) {
        Fragment fragment = Fragment.instantiate(this.activity, cls.getName());
        setMenuFragment(fragment);
    }

    public void setMenuFragment(Fragment fragment) {
        FragmentManager manager = this.activity.getSupportFragmentManager();
        FragmentTransaction transaction = manager.beginTransaction();
        transaction.replace(R.id.flMenuContainer, fragment);
        transaction.commit();
    }

    public boolean isMenuVisible() {
        return this.menuContainer.getVisibility() == View.VISIBLE;
    }

    // We pass the width of the menu in dip to showMenu()
    public void showMenu(int dpWidth) {

        // We convert the width from dip into pixels
        final int menuWidth = LayoutHelper.dpToPixel(this.activity, dpWidth);

        // We move the Activity out of the way
        slideTo(menuWidth, 0);

        // We have to take the height of the status bar at the top into account!
        Rect rectangle = new Rect();
        Window window = this.activity.getWindow();
        window.getDecorView().getWindowVisibleDisplayFrame(rectangle);
        final int statusBarHeight = rectangle.top;

        // These are the LayoutParams for the menu Fragment
        FrameLayout.LayoutParams fragmentParams = new FrameLayout.LayoutParams(menuWidth, ViewGroup.LayoutParams.MATCH_PARENT);

        // We put a top margin on the menu Fragment container which is equal to the status bar height
        fragmentParams.setMargins(0, statusBarHeight, 0, 0);
        this.menuContainer.setLayoutParams(fragmentParams);

        // Perform the animation only if the menu is not visible
        if(!isMenuVisible()) {

            // Visibility of the menu container View is set to VISIBLE
            this.menuContainer.setVisibility(View.VISIBLE);

            // The menu slides in from the right
            TranslateAnimation animation = new TranslateAnimation(-menuWidth, 0, 0, 0);
            animation.setDuration(500);
            this.menuContainer.startAnimation(animation);
        }
    }

    public void hideMenu() {

        // We can only hide the menu if it is visible
        if(isMenuVisible()) {

            // We slide the Activity back to its original position
            slideTo(0, 0);

            // We need the width of the menu to properly animate it
            final int menuWidth = this.menuContainer.getWidth();

            // Now we need an extra animation for the menu fragment container
            TranslateAnimation menuAnimation = new TranslateAnimation(0, -menuWidth, 0, 0);
            menuAnimation.setDuration(500);
            menuAnimation.setAnimationListener(new Animation.AnimationListener() {
                @Override
                public void onAnimationStart(Animation animation) {

                }

                @Override
                public void onAnimationEnd(Animation animation) {
                    // As soon as the hide animation is finished we set the visibility of the fragment container back to GONE
                    menuContainer.setVisibility(View.GONE);
                }

                @Override
                public void onAnimationRepeat(Animation animation) {

                }
            });
            this.menuContainer.startAnimation(menuAnimation);
        }
    }

    public void slideTo(int x, int y) {

        // We get the current position of the Activity
        final int currentX = getActivityPositionX();
        final int currentY = getActivityPositionY();

        // The new position is set
        setActivityPosition(x, y);

        // We animate the Activity to slide from its previous position to its new position
        TranslateAnimation animation = new TranslateAnimation(currentX - x, 0, currentY - y, 0);
        animation.setDuration(500);
        this.content.startAnimation(animation);
    }

    public void setActivityPosition(int x, int y) {
        // With this if statement we can check if the devices API level is above Honeycomb or below
        if(Build.VERSION.SDK_INT >= Build.VERSION_CODES.HONEYCOMB) {
            // On Honeycomb or above we set a margin
            FrameLayout.LayoutParams contentParams = (FrameLayout.LayoutParams) this.content.getLayoutParams();
            contentParams.setMargins(x, y, -x, -y);
            this.content.setLayoutParams(contentParams);
        } else {
            // And on devices below Honeycomb we set a padding
            this.content.setPadding(x, y, -x, -y);
        }
    }

    public int getActivityPositionX() {
        if(Build.VERSION.SDK_INT >= Build.VERSION_CODES.HONEYCOMB) {
            // On Honeycomb or above we return the left margin
            FrameLayout.LayoutParams contentParams = (FrameLayout.LayoutParams) this.content.getLayoutParams();
            return contentParams.leftMargin;
        } else {
            // On devices below Honeycomb we return the left padding
            return this.content.getPaddingLeft();
        }
    }

    public int getActivityPositionY() {
        if(Build.VERSION.SDK_INT >= Build.VERSION_CODES.HONEYCOMB) {
            // On Honeycomb or above we return the top margin
            FrameLayout.LayoutParams contentParams = (FrameLayout.LayoutParams) this.content.getLayoutParams();
            return contentParams.topMargin;
        } else {
            // On devices below Honeycomb we return the top padding
            return this.content.getPaddingTop();
        }
    }
}
I use a static helper method in showMenu() to convert dip to pixels. Here is the code of this method:
public static int dpToPixel(Context context, int dp) {
    float scale = getDisplayDensityFactor(context);
    return (int) (dp * scale + 0.5f);
}

private static float getDisplayDensityFactor(Context context) {
    if (context != null) {
        Resources res = context.getResources();
        if (res != null) {
            DisplayMetrics metrics = res.getDisplayMetrics();
            if(metrics != null) {
                return metrics.density;
            }
        }
    }
    return 1.0f;
}
You can use this new version of the ActivitySlider class like this:
ActivitySlider slider = new ActivitySlider(activity);
slider.setMenuFragment(MenuFragment.class);

// The menu is shown with a width of 200 dip
slider.showMenu(200);

...

// Hide the menu again
slider.hideMenu();
4) Conclusion & Testing
Doing something like this is surprisingly easy when you know that you can simply put a margin or a padding on the View of the Activity. But the difficulty is in making it work on a lot of different devices. Implementations can change a lot across multiple API Levels and that can have considerable influence on how this behaves. Having said that any code I posted here should work on most if not all devices above Eclair (Android 2.1 - API level 7) without any problems.
Of course the solution I posted here is not complete, it could use a little extra polishing and cleaning up, so feel free to improve the code to suit your needs!
I have tested everything on the following devices:
HTC
One M8 (Android 4.4.2 - KitKat): Working Sensation (Android 4.0.3 - Ice Cream Sandwich): Working Desire (Android 2.3.3 - Gingerbread): Working One (Android 4.4.2 - KitKat): WorkingSamsung
Galaxy S3 Mini (Android 4.1.2 - Jelly Bean): Working Galaxy S4 Mini (Android 4.2.2 - Jelly Bean): Working Galaxy S4 (Android 4.4.2 - KitKat): Working Galaxy S5 (Android 4.4.2 - KitKat): Working Galaxy S Plus (Android 2.3.3 - Gingerbread): Working Galaxy Ace (Android 2.3.6 - Gingerbread): Working Galaxy S2 (Android 4.1.2 - Jelly Bean): Working Galaxy S3 (Android 4.3 - Jelly Bean): Working Galaxy Note 2 (Android 4.3 - Jelly Bean): Working Galaxy Nexus (Android 4.2.1 - Jelly Bean): WorkingMotorola
Moto G (Android 4.4.2 - KitKat): WorkingLG
Nexus 5 (Android 4.4.2 - KitKat): WorkingZTE
Blade (Android 2.1 - Eclair): WorkingI hope I could help you and if you have any further questions or anything else is unclear please feel free to ask!


