我怎样才能实现与Android的自定义按钮自定义的操作栏?自定义、按钮、操作、Android
我要实现自定义的动作条必须是这样的:
那么问题:
如何实现像自定义视图按钮:只是一些图片 我怎么能画一条线在动作条?顶
我怎样才能实现无按键分割线:添加标签的动作条或者是
解决方案
这是pretty的多接近你会得到,如果你想使用动作条的API。我不知道,你可以将上面的动作条 A colorstrip没有做一些奇怪的窗口黑客,这是不值得的麻烦。至于改变的的MenuItems 的推移,你可以使那些通过风格更紧。这将是这样的事情,但我还没有测试它。
 <样式名称=MyTheme的父=机器人:Theme.Holo.Light>
    <项目名称=actionButtonStyle> @风格/ MyActionButtonStyle< /项目>
< /风格>

<样式名称=MyActionButtonStyle父=Widget.ActionButton>
    <项目名称=安卓了minWidth> 28DIP< /项目>
< /风格>
下面是如何膨胀,并添加自定义布局到你的动作条。
  //充气您的自定义布局
    最后的ViewGroup actionBarLayout =(ViewGroup中)getLayoutInflater()。膨胀(
            R.layout.action_bar,
            空值);

    //设置你的动作条
    最后的动作条动作条= getActionBar();
    actionBar.setDisplayShowHomeEnabled(假);
    actionBar.setDisplayShowTitleEnabled(假);
    actionBar.setDisplayShowCustomEnabled(真正的);
    actionBar.setCustomView(actionBarLayout);

    //你定制
    最终诠释actionBarColor = getResources()的getColor(R.color.action_bar)。
    actionBar.setBackgroundDrawable(新ColorDrawable(actionBarColor));

    最终按钮actionBarTitle =(按钮)findViewById(R.id.action_bar_title);
    actionBarTitle.setText(索引(2));

    最终按钮actionBarSent =(按钮)findViewById(R.id.action_bar_sent);
    actionBarSent.setText(已发送);

    最终按钮actionBarStaff =(按钮)findViewById(R.id.action_bar_staff);
    actionBarStaff.setText(员工);

    最终按钮actionBarLocations =(按钮)findViewById(R.id.action_bar_locations);
    actionBarLocations.setText(HIPPA位置);
这里的自定义布局:
< LinearLayout中的xmlns:机器人=http://schemas.android.com/apk/res/android
机器人:layout_width =WRAP_CONTENT
机器人:layout_height =WRAP_CONTENT
机器人:启用=假
机器人:方向=横向
机器人:paddingEnd =8DIP>
<按钮
机器人:ID =@ + ID / action_bar_title
风格=@风格/ ActionBarButtonWhite/>
<按钮
机器人:ID =@ + ID / action_bar_sent
风格=@风格/ ActionBarButtonOffWhite/>
<按钮
机器人:ID =@ + ID / action_bar_staff
风格=@风格/ ActionBarButtonOffWhite/>
<按钮
机器人:ID =@ + ID / action_bar_locations
风格=@风格/ ActionBarButtonOffWhite/>
< / LinearLayout中>
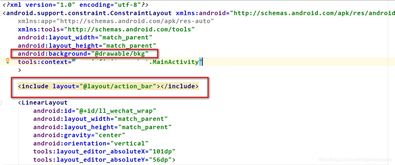
这里的色彩带布局:要使用它,只需使用合并您在的setContentView 。
<的FrameLayout的xmlns:机器人=http://schemas.android.com/apk/res/android
机器人:layout_width =match_parent
机器人:layout_height =@扪/ colorstrip
机器人:背景=@机器人:彩色/ holo_blue_dark/>
下面是按钮的风格:
 <样式名称=ActionBarButton>
    <项目名称=机器人:layout_width> WRAP_CONTENT< /项目>
    <项目名称=机器人:layout_height> WRAP_CONTENT< /项目>
    <项目名称=机器人:背景> @空< /项目>
    <项目名称=机器人:ellipsize>结束< /项目>
    <项目名称=机器人:单线>真< /项目>
    <项目名称=机器人:TEXTSIZE> @扪/ text_size_small< /项目>
< /风格>

<样式名称=ActionBarButtonWhite父=@风格/ ActionBarButton>
    <项目名称=机器人:文字颜色> @色/白< /项目>
< /风格>

<样式名称=ActionBarButtonOffWhite父=@风格/ ActionBarButton>
    <项目名称=机器人:文字颜色> @色/ off_white< /项目>
< /风格>
下面是我使用的颜色和尺寸:
 <颜色名称=action_bar>#ff0d0d0d< /彩色>
<颜色名称=白>#FFFFFFFF< /彩色>
<颜色名称=off_white>#99ffffff< /彩色>

<! - 文字大小 - >
<扪名=text_size_small> 14.0sp< /扪>
<扪名=text_size_medium> 16.0sp< /扪>

<! - 动作条的颜色条 - >
<扪名=colorstrip> 5DP< /扪>
如果你想定制它比这更
,你可以考虑不使用动作条可言,但我不会建议。您也可以考虑通过 Android的设计准则阅读,以获取有关如何设计你的动作条。
如果您选择放弃动作条,并使用自己的布局相反,你应该是一定要加的动作,能够敬酒当用户长时间preSS你的MenuItems。使用该主旨这可以容易地实现
I want to implement custom ActionBar which must look like this:
So questions:
How can I implement a button like custom view: just some image? How can I draw a line on the top of theActionBar?
And how can I implement buttons without separator lines: add tabs on the ActionBar or what?
解决方案
This is pretty much as close as you'll get if you want to use the ActionBar APIs. I'm not sure you can place a colorstrip above the ActionBar without doing some weird Window hacking, it's not worth the trouble. As far as changing the MenuItems goes, you can make those tighter via a style. It would be something like this, but I haven't tested it.
<style name="MyTheme" parent="android:Theme.Holo.Light">
    <item name="actionButtonStyle">@style/MyActionButtonStyle</item>
</style>

<style name="MyActionButtonStyle" parent="Widget.ActionButton">
    <item name="android:minWidth">28dip</item>
</style>
Here's how to inflate and add the custom layout to your ActionBar.
    // Inflate your custom layout
    final ViewGroup actionBarLayout = (ViewGroup) getLayoutInflater().inflate(
            R.layout.action_bar,
            null);

    // Set up your ActionBar
    final ActionBar actionBar = getActionBar();
    actionBar.setDisplayShowHomeEnabled(false);
    actionBar.setDisplayShowTitleEnabled(false);
    actionBar.setDisplayShowCustomEnabled(true);
    actionBar.setCustomView(actionBarLayout);

    // You customization
    final int actionBarColor = getResources().getColor(R.color.action_bar);
    actionBar.setBackgroundDrawable(new ColorDrawable(actionBarColor));

    final Button actionBarTitle = (Button) findViewById(R.id.action_bar_title);
    actionBarTitle.setText("Index(2)");

    final Button actionBarSent = (Button) findViewById(R.id.action_bar_sent);
    actionBarSent.setText("Sent");

    final Button actionBarStaff = (Button) findViewById(R.id.action_bar_staff);
    actionBarStaff.setText("Staff");

    final Button actionBarLocations = (Button) findViewById(R.id.action_bar_locations);
    actionBarLocations.setText("HIPPA Locations");
Here's the custom layout:
<LinearLayout xmlns:android="http://schemas.android.com/apk/res/android"
    android:layout_width="wrap_content"
    android:layout_height="wrap_content"
    android:enabled="false"
    android:orientation="horizontal"
    android:paddingEnd="8dip" >

    <Button
        android:id="@+id/action_bar_title"
        style="@style/ActionBarButtonWhite" />

    <Button
        android:id="@+id/action_bar_sent"
        style="@style/ActionBarButtonOffWhite" />

    <Button
        android:id="@+id/action_bar_staff"
        style="@style/ActionBarButtonOffWhite" />

    <Button
        android:id="@+id/action_bar_locations"
        style="@style/ActionBarButtonOffWhite" />

</LinearLayout>
Here's the color strip layout: To use it, just use merge in whatever layout you inflate in setContentView.
<FrameLayout xmlns:android="http://schemas.android.com/apk/res/android"
    android:layout_width="match_parent"
    android:layout_height="@dimen/colorstrip"
    android:background="@android:color/holo_blue_dark" />
Here are the Button styles:
<style name="ActionBarButton">
    <item name="android:layout_width">wrap_content</item>
    <item name="android:layout_height">wrap_content</item>
    <item name="android:background">@null</item>
    <item name="android:ellipsize">end</item>
    <item name="android:singleLine">true</item>
    <item name="android:textSize">@dimen/text_size_small</item>
</style>

<style name="ActionBarButtonWhite" parent="@style/ActionBarButton">
    <item name="android:textColor">@color/white</item>
</style>

<style name="ActionBarButtonOffWhite" parent="@style/ActionBarButton">
    <item name="android:textColor">@color/off_white</item>
</style>
Here are the colors and dimensions I used:
<color name="action_bar">#ff0d0d0d</color>
<color name="white">#ffffffff</color>
<color name="off_white">#99ffffff</color>

<!-- Text sizes -->
<dimen name="text_size_small">14.0sp</dimen>
<dimen name="text_size_medium">16.0sp</dimen>

<!-- ActionBar color strip -->
<dimen name="colorstrip">5dp</dimen>
If you want to customize it more than this, you may consider not using the ActionBar at all, but I wouldn't recommend that. You may also consider reading through the Android Design Guidelines to get a better idea on how to design your ActionBar.
If you choose to forgo the ActionBar and use your own layout instead, you should be sure to add action-able Toasts when users long press your "MenuItems". This can be easily achieved using this Gist.