使用了Android的谷歌云打印API使用了、Android、API、谷歌云
我的工作,需要打印到打印机Android应用程序。我决定使用谷歌云打印,因为它似乎很容易设置。起初,我也跟着步骤中发现这里整合到Android系统。这个方法奏效,因为它会打印到我需要的打印机。然而,这个过程是一个位所涉及的用户。在我的情况下,过程如下:
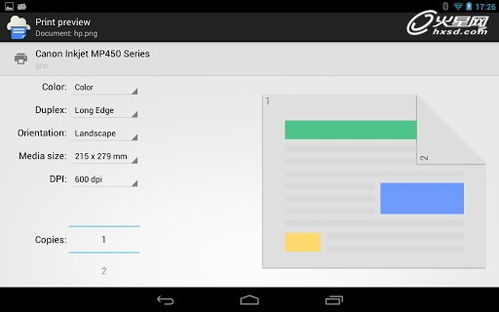
在用户选择,我旁边显示的一些信息打印按钮。 一个对话框显示用什么都会被打印在preVIEW。有一个在动作条,上面写着打印按钮。这开始的过程。 在一个新的活动中显示的显示连接到用户谷歌帐户的打印机列表。用户必须选择一个。 在一个新的页面如图给打印作业的说明。 用户必须选择在右上角的打印。 在打印作业启动打印机打印出来的图片。不幸的是,我的客户不希望这个过程。他们希望用户点击打印,在步骤2,再有打印的照片(步骤1,2和6)。因此,我不能使用由谷歌提供的意向,我一定要用实际的API。这就要求我得到谷歌的身份验证令牌,获得所需的打印机,并提交打印作业的方式。我做到以下几点:
使用谷歌播放服务来检索的OAuth令牌的用户的Gmail帐户。 获取使用/搜索API调用打印机列表。 使用/提交API调用提交的打印作业。我的第一个喝完了。我只是有与画面的实际打印的麻烦。代替印刷的图片,图片的字节数据正在被打印(Base64的烯$ C $光盘)。下面是一些code至于如何我发送了请求:
ContentResolver的ContentResolver的= context.getContentResolver();
尝试 {
InputStream的是= contentResolver.openInputStream(URI);
ByteArrayOutputStream BAOS =新ByteArrayOutputStream();
byte []的缓冲区=新的字节[4096];
INT N = is.read(缓冲区);
而(N> = 0){
baos.write(缓冲液,0,n)的;
N = is.read(缓冲区);
}
is.close();
baos.flush();
内容= Base64.en codeToString(baos.toByteArray(),Base64.DEFAULT);
}赶上(FileNotFoundException异常E){
Log.d(TAG,找不到文件:+ uri.toString(),E);
}赶上(IOException异常E){
e.printStackTrace();
}
这code检索图片(变量URI是该文件的URI),并将其转换为Base64连接codeD字符串。这是提供了谷歌云打印页面(链接到以上)上的PrintDialogActivity使用同样的方法。下面是我如何发送了:
网址: http://www.google.com/cloudprint/submit?access_token=[AUTH_TOKEN_GOES_HERE]&cookies=false&printerid=[PRINTER_ID_HERE] 在HTTP方法:POST POST参数:[printerId = PRINTER_ID_HERE,标题= TestPrint,则contentType =为image / jpeg,能力= {能力:[{}]},内容= [Base64的恩codeD数据串放在这里]据我所知,这是它是如何应该是。打印时:我得到的{真正的成功}的响应。但是,正如我上面所说的,它打印出的实际Base64的数据串。任何帮助将是AP preciated。
编辑:使用什么powerje低于说,我设法解决这个问题。而不是使用上面的code,我用下面的:
公共无效submitPrintJobWithFile(字符串printerId,标题字符串,字符串令牌,文件路径字符串,字符串的contentType){
档案文件=新的文件(文件路径);
//方法,获取正确的头
名单<头>标题= getHeaders(的contentType,令牌);
//方法得到了正确的岗位参数
字符串URL = CLOUDPRINT_URL + PATH_SUBMIT;
名单<的NameValuePair> postParams = getParams能够(标题,则contentType);
字符串PARAMS =access_token =+令牌+&放大器;饼干=假+&放大器; printerid =+ printerId;
URL + = PARAMS;
响应= sendMultipartData(URL,文件,postParams,标题);
}
私人字符串sendMultipartData(字符串URL,文件的文件,目录和LT;的NameValuePair>字段,列表和LT;头>头){
HttpPost后=新HttpPost(URL);
MultipartEntity实体=新MultipartEntity();
对于(的NameValuePair对:字段){
字符串名称= pair.getName();
字符串值= pair.getValue();
尝试{
entity.addPart(名称,新StringBody(值));
}赶上(UnsupportedEncodingException E){
Log.d(TAG,错误转向对(NAME =+姓名+,值=+价值+)为StringBody。);
}
entity.addPart(内容,新FileBody(文件));
post.setEntity(实体);
//完成HttpClient的请求,在这里...
}
解决方案
看起来你需要使用多编码,例如这里:
的http://blog.tacticalnuclearstrike.com/2010/01/using-multipartentity-in-android-applications/
FTA:
需要的文件为 Apache的mime4j ,的 HttpClient的,的HttpCore和httpmime 。所有由阿帕奇的基础之上的开源项目。
下载的4个文件,并将它们添加到您的项目,那么你应该可以使用下面的code张贴字符串和文件的页面。
  HttpClient的HttpClient的=新DefaultHttpClient();
HttpPost httppost =新HttpPost(http://www.tumblr.com/api/write);

尝试 {
    MultipartEntity实体=新MultipartEntity();

    entity.addPart(类,新StringBody(图片));
    entity.addPart(数据,新FileBody(图片));
    httppost.setEntity(实体);
    HTT presponse响应= httpclient.execute(httppost);
}赶上(ClientProtocolException E){
}赶上(IOException异常E){
}
在这种情况下的图像变量是包含由手机上的照相机拍摄的图像文件。
I am working on an android application that needs to print to a printer. I decided on using the Google Cloud Print, as it seemed easy to set up. Initially, I followed the steps found here for integrating into Android. This works, as in it will print to my desired printer. However, this process is a bit involved for the user. In my case, the process is as follows:
The user selects the print button that I have displayed next to some information. A Dialog is shown with a preview of what will be printed. There is a button in the ActionBar that says "Print". This begins the process. A new Activity is displayed showing a list of printers that are connected to that users Google Account. The user must select one. A new page is shown giving a description of the print job. The user has to select "Print" in the upper right hand corner. The print job is started and the printer prints out the picture.Unfortunately, my client does not want this process. They want the user to click "Print" in step two, and then have the picture printed (steps 1, 2 and 6). Thus, I cannot use Intent provided by Google, I must use the actual API. This requires me to get a Google Auth token, get the desired printer, and submit a print job that way. I do the following:
Use the Google Play Services to retrieve an OAuth token for the users Gmail account. Get a list of printers using the /search API call. Submit a print job using the /submit API call.I have the first two finished. I am just having trouble with the actual printing of the picture. Instead of printing the picture, the byte data of the picture is being printed (Base64 encoded). Here is some code as to how I am sending up the request:
ContentResolver contentResolver = context.getContentResolver();
try {
    InputStream is = contentResolver.openInputStream(uri);
    ByteArrayOutputStream baos = new ByteArrayOutputStream();

    byte[] buffer = new byte[4096];
    int n = is.read(buffer);
    while (n >= 0) {
            baos.write(buffer, 0, n);
            n = is.read(buffer);
    }
    is.close();
    baos.flush();

    content = Base64.encodeToString(baos.toByteArray(), Base64.DEFAULT);
} catch (FileNotFoundException e) {
    Log.d(TAG, "File not found: " + uri.toString(), e);
} catch (IOException e) {
    e.printStackTrace();
}
This code retrieves the picture (the variable "uri" is the URI of that file), and turns it into a Base64 encoded string. This is the same method used in the PrintDialogActivity that is provided on the Google Cloud Print page (linked to above). The following is how I send that up:
URL: http://www.google.com/cloudprint/submit?access_token=[AUTH_TOKEN_GOES_HERE]&cookies=false&printerid=[PRINTER_ID_HERE] HTTP Method: POST POST Parameters: [printerId=PRINTER_ID_HERE, title=TestPrint, contentType=image/jpeg, capabilities={"capabilities":[{}]}, content=[Base64 Encoded data string is placed here]]As far as I can tell, this is how it is supposed to be. I am getting a response of {"success":true} when printing. But, as I said above, it prints out the actual Base64 data string. Any help would be appreciated.
EDIT: Using what powerje said below, I managed to fix this. Rather than using the code above, I used the following:
public void submitPrintJobWithFile(String printerId, String title, String token, String filePath, String contentType){
    File file = new File(filePath);
    // Method that gets the correct headers
    List<Header> headers = getHeaders(contentType, token);
    // Method that gets the correct post parameters
    String url = CLOUDPRINT_URL + PATH_SUBMIT;
    List<NameValuePair> postParams = getParams(title, contentType);
    String params = "access_token=" + token + "&cookies=false" + "&printerid=" + printerId;
    url += params;
    response = sendMultipartData(url, file, postParams, headers);
}

private String sendMultipartData(String url, File file, List<NameValuePair> fields, List<Header> headers){
    HttpPost post = new HttpPost(url);
    MultipartEntity entity = new MultipartEntity();
    for(NameValuePair pair : fields){
        String name = pair.getName();
        String value = pair.getValue();
        try{
            entity.addPart(name, new StringBody(value));
        }catch (UnsupportedEncodingException e){
            Log.d(TAG, "Error turning pair (name=" + name + ", value=" + value + ") into StringBody.");
    }
    entity.addPart("content", new FileBody(file));
    post.setEntity(entity);
    // Finish HttpClient request here...
}
解决方案
It looks like you need to use multipart encoding, example here:
http://blog.tacticalnuclearstrike.com/2010/01/using-multipartentity-in-android-applications/
FTA:
The files needed are apache-mime4j, httpclient, httpcore and httpmime. All are opensource projects built by the Apache foundation.
Download the 4 files and add them to your project then you should be able to use the following code to post strings and files to pages.
HttpClient httpclient = new DefaultHttpClient();
HttpPost httppost = new HttpPost("http://www.tumblr.com/api/write");

try {
    MultipartEntity entity = new MultipartEntity();

    entity.addPart("type", new StringBody("photo"));
    entity.addPart("data", new FileBody(image));
    httppost.setEntity(entity);
    HttpResponse response = httpclient.execute(httppost);
} catch (ClientProtocolException e) {
} catch (IOException e) {
}
The image variable in this case is a File that contains an image captured by the camera on the phone.